


Last Updated: October 29, 2026
Quick Summary
Pass-it-on kindness stones are small painted rocks that children decorate with a positive message and leave for a stranger to find. The finder keeps the stone, enjoys the message, then passes the kindness on by hiding it again or doing something kind for someone else. This simple craft can turn an afternoon into a lesson in empathy, and it costs very little to set up.
- Wash stones in warm soapy water and let them air dry completely before painting.
- Match the painting technique to the child's age, from bold shapes for ages 4 to 6 to detailed lettering for ages 10 to 12.
- Seal painted stones with two thin coats of water-based acrylic varnish, including the unpainted base.
- Keep stones out of streams, ponds, nature reserves and protected woodland to avoid harming wildlife.
- Check your council's website for parks and open spaces rules before hiding stones.
Table of Contents
- What Are Pass-It-On Kindness Stones and Why They Work
- Materials You Need Before You Start Painting
- Step-by-Step: Preparing and Painting Your Stones
- Positive Messages for Kindness Stones That Kids Love to Write
- How to Seal Painted Rocks for Outdoors So They Last
- The Benefits of Teaching Empathy Through Creative Play
- Kindness Stones Scavenger Hunt Ideas for Families and Classrooms
- Where to Hide Your Stones and How to Keep It Ethical
- Frequently Asked Questions
What Are Pass-It-On Kindness Stones and Why They Work
Pass-it-on kindness stones are small painted rocks, often called kindness stones, that children decorate with a positive message and leave for a stranger to find.
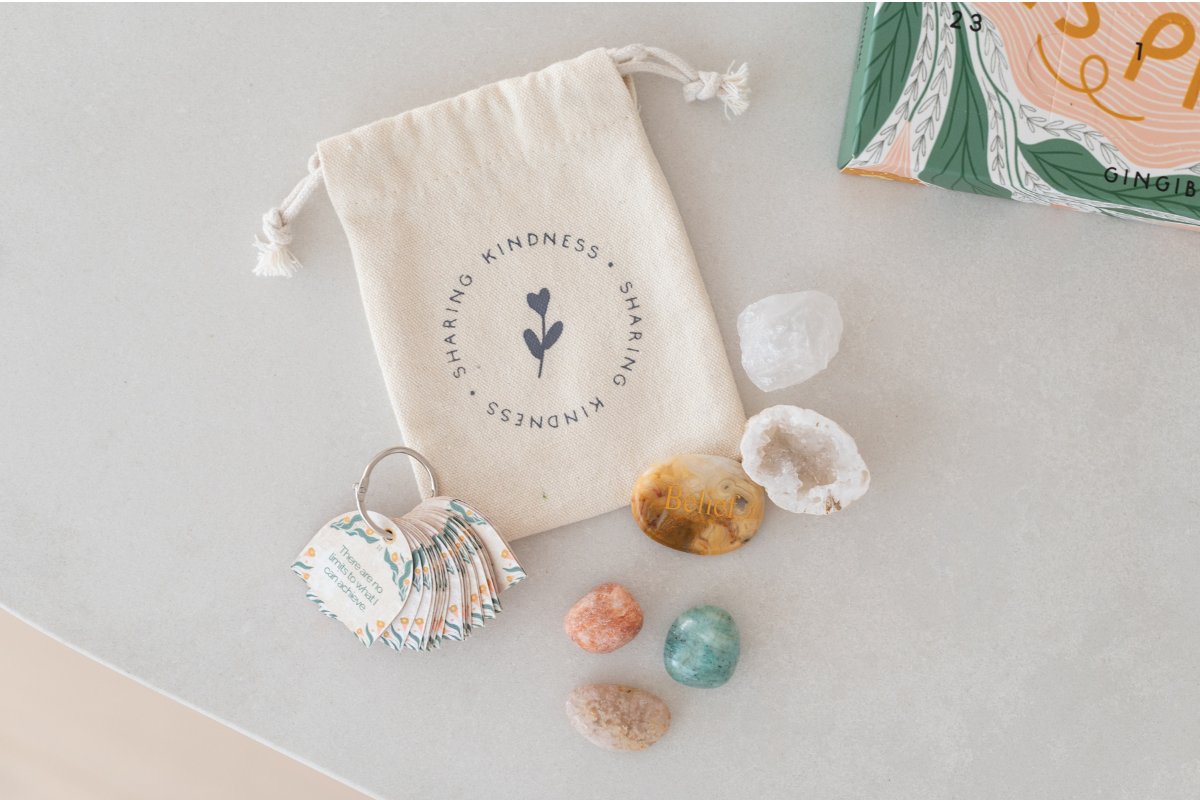
The idea works because it gives a child something concrete to do with a big, abstract feeling. If you would rather skip the painting, a crystal gift set for kids comes with pass-it-on cards ready to share.

It also gives shy kids a way in. Not every child wants to hand a gift to a stranger face to face, and hiding a painted stone lets them be generous without the pressure of a conversation.
Below, we'll walk through supplies, painting steps, message ideas, sealing, hiding spots and the ethical bits most guides skip.
Materials You Need Before You Start Painting
Gather everything first, because once small hands are covered in paint, nobody wants to go hunting for a missing brush.
- Smooth stones: river rocks or decorative pebbles with a flat, smooth surface
- Acrylic paint pens: easier for small hands to control than brushes and pots
- Acrylic paint and a few brushes: for filling in backgrounds and larger shapes
A common mistake is buying glossy, varnished pebbles. Paint can slide straight off them. Look for matte, porous stones instead.
If you want to fill a whole rainy day, a list of screen free activities for kids pairs well with a rock-painting session.
Step-by-Step: Preparing and Painting Your Stones
Good prep and a simple plan make the difference between a stone that lasts and one that flakes by the weekend.
Choosing the Right Stones and Surface Preparation
Pick stones that are smooth, dry and roughly palm-sized. Wash them in warm soapy water, rinse well, then let them air dry completely, since grit or moisture stops the paint from sticking.
Once dry, rub the surface with a dry cloth to check for dust. Skip waxy stones; porous ones grip paint best.
Painting Techniques for Different Ages
Match the technique to the child, not the other way around. Little ones get frustrated fast when a craft is too fiddly.
- Ages 4 to 6: one bold background colour, then a single heart, smiley face or sun. Paint pens work better than brushes here.
- Ages 7 to 9: simple words, dots, stripes and small flowers. Let them plan the design on paper first.
- Ages 10 to 12: detailed lettering, layered colours and patterns. Fine-tip markers help with tidy writing.
Let each layer dry before adding the next. Rushing this step is the most common reason designs smudge.
Here is how the painting technique changes with the child's age.
| Age group | What to paint | Helpful tool |
|---|---|---|
| Ages 4 to 6 | One bold background colour, then a single heart, smiley face or sun | Paint pens |
| Ages 7 to 9 | Simple words, dots, stripes and small flowers | Plan the design on paper first |
| Ages 10 to 12 | Detailed lettering, layered colours and patterns | Fine-tip markers |
Positive Messages for Kindness Stones That Kids Love to Write
The best messages are short, warm and easy to read in one glance. Children often write what they most need to hear.
Try these starters:
- "You are enough"
- "Keep going"
- "Be kind today"
For older or more cynical kids, skip the sweet stuff. A dry message like "This rock is yours now.
If you want to help children think about how a stranger might feel when they find the stone, these perspective taking activities for kids are a natural next step.
How to Seal Painted Rocks for Outdoors So They Last
Sealing decides whether a painted stone survives a week of British rain or a full season in a park. This section covers the finish and what it means for the ground the stone sits on.
Choosing a Sealant That Survives British Weather
Acrylic clear coat is the standard choice because it dries flexible and resists moisture. For outdoor stones, look for a water-based acrylic varnish labelled for exterior use.
Finish matters as much as chemistry. Matte and satin varnishes keep the stone looking like a stone, which helps it blend into a wall or bench. Gloss stands out, but it shows scratches more clearly once the stone has been handled and re-hidden a few times.
The Two-Thin-Coats Method
Wait until the paint is fully dry, usually a few hours or overnight depending on humidity. Apply the first coat thinly with a soft brush, working from the centre outwards so you do not drag paint.
A common failure is sealing too early. Paint that feels dry to the touch can still be soft underneath, and a sealant layer over it locks moisture in. The design then lifts or peels within days.
Weather-Proofing Beyond the Sealant
Sealant is not the only variable. Stones left on the ground take in water through any unsealed underside, so turn each stone over and seal the base too, even if it is unpainted.
Ultraviolet light also fades acrylics over months, with reds, oranges and yellows fading fastest. If a child wants a stone to last a full season outdoors, suggest a design that leans on blues, greens and whites, or accept that the stone will soften in colour.
The Environmental Question Most Guides Skip
Standard acrylic paint pens and solvent-based sealants are plastic-based. Once a stone is left outdoors, the sealant slowly breaks down into microplastic fragments that enter soil and, near drains and streams, local waterways. That does not make the craft harmful in itself, but it changes where stones should go.
A few practical choices reduce the impact:
- Use water-based acrylic paint and water-based varnish rather than solvent-based products where possible
- Seal the whole stone, including the base, so the coating degrades as one layer rather than flaking into fragments
- Keep stones out of streams, ponds, nature reserves and protected woodland, where any foreign object is a problem for wildlife and rangers
If a child asks why the stone cannot go in the stream at the bottom of the garden, that question is a good opening for a short conversation about litter, habitats and why some places are for looking and not for leaving things.
For families who want to keep the activity low-waste, our guide to screen free activities for kids includes other outdoor projects that leave nothing behind.
The Benefits of Teaching Empathy Through Creative Play
Craft activities give children a low-stakes way to practise seeing things from another person's point of view. Painting a stone for a stranger asks a child to imagine who might find it and how they might feel. That's empathy in action, not a worksheet about it.
The benefits show up in small, everyday ways:
- Children learn that kindness can be quiet and anonymous
- Making something for someone else builds confidence
- The craft gives shy kids a gentle way to connect with others
For parents who want to go further, everyday habits that build on this craft are a useful next step.
Kindness Crystals | Pass-It-On Stone Set →
Kindness Stones Scavenger Hunt Ideas for Families and Classrooms
A scavenger hunt turns the craft into an outdoor activity the whole family or class can enjoy together.
Try these formats:
- Neighbourhood hunt: hide stones along a set route, then walk it together and spot them
- Classroom swap: each child paints a stone, then hides it for a classmate to find
- Find and re-hide: whoever finds a stone keeps it for a day, then hides it somewhere new
Keep the hunt small and local. A handful of stones along one street beats a sprawling plan that never happens.
If your family enjoys this kind of activity, our guide to a family kindness jar tradition gives you another ongoing ritual to try.
Where to Hide Your Stones and How to Keep It Ethical
Hiding spots should be safe, public and easy to reach without damaging anything. The bigger question, and the one most guides avoid, is whether you are allowed to leave a stone there at all. This section covers both, plus a simple way to track where stones travel.
Good Hiding Spots for Kindness Stones
Stick to urban public spaces where a small painted stone reads as a gift rather than litter:
- Park benches and low walls at child height, where a stone is visible but not in the way
- Community noticeboards and library entrances, with permission from the venue
- Playground edges and fence ledges, away from play equipment and paths
Avoid grass verges where mowers run, roads, car parks, railway property and anywhere a stone could roll into a drain or trip someone.
The Legal and Ethical Rules Most Guides Miss
Leaving objects in public space is governed by local rules, and these vary. In the UK, councils generally treat unattended objects on public land under their own parks and open spaces by-laws, and some prohibit leaving items without permission. National parks and protected natural areas have stricter rules, and rangers routinely remove foreign objects because they can disturb wildlife and habitats.
Before a hiding session, do three quick checks:
- Check your council's website for parks and open spaces rules on leaving items
- Ask at the venue if you plan to hide stones in a library, community centre or shop
- Keep off protected land, including national parks, nature reserves, Sites of Special Scientific Interest and land managed by wildlife trusts
A simple rule for children: if the stone would need to be tied, glued or wedged to stay put, it is the wrong spot. A stone should sit somewhere it could be picked up by the next person without effort.
Tracking Where Stones Travel
A shared photo album or a local community page turns a solo craft into a connected project. Give each stone a short code on the base, such as a name and a number, and invite finders to post where they found it.
Some groups use a QR code printed on a small label on the base of the stone, linking to a photo album or a map where finders can drop a pin.
If your family enjoys this kind of activity, our guide to a family kindness jar tradition gives you another ongoing ritual to try.
Frequently Asked Questions
What should I write on kindness stones for kids?
Keep it short and positive. Simple phrases like 'You are loved', 'Smile', 'Keep going' or 'Share this stone' work well because they fit on a small surface and are easy for young children to write. Older kids might enjoy 'Be kind to yourself' or 'You matter'. Avoid anything negative or overly personal. The best positive messages for kindness stones are the ones a child chooses themselves, because ownership makes them more likely to want to hide and share the stone.
What materials do I need to make kindness stones?
You need smooth river rocks or decorative pebbles, acrylic paint or acrylic paint pens, a paintbrush or two, a cup of water and a cloth for wiping. For the finish, a clear coat sealant labelled for outdoor use is essential if the stones will be hidden outside. A waterproof finish protects the design from rain and sun. Optional extras include stickers, stencils and a small bag to carry the stones on your hiding trip.
How does painting kindness stones help children develop empathy?
Painting a stone for someone else asks a child to think about how another person might feel when they find it. That shift in perspective is the core of empathy. The benefits of teaching empathy through creative play include better emotional vocabulary, more prosocial behaviour and stronger social emotional learning. The pass-it-on format adds a lesson in letting go, since the child will not see the reaction.
Are there rules for the kindness stones movement?
There are no official rules, but there are sensible ethical guidelines. Only hide stones in public spaces where they are allowed, such as parks, playgrounds and footpaths. Avoid placing them on private property, in protected natural areas or anywhere they could damage the environment. Use non-toxic paint and sealant, and never hide stones where they could be a hazard. The pass-it-on spirit works best when the stone is left for someone to find and keep or re-hide.
